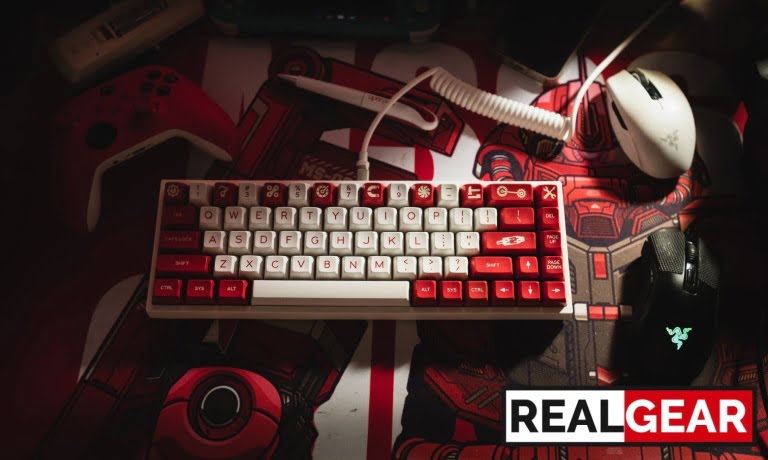
You saw your favorite streamer using a custom mechanical keyboard in one of their live streams, and now you feel like you’re missing out on the real thocky fun. You want to build a custom chad mechanical keyboard but have no idea where to start. Don’t worry; we’ve got you covered!
In this how-to-build custom keyboard guide, we’ll give you step-by-step instructions (along with pro tips, personal recommendations, and expected costs) on building your own custom keyboard. You’ll also learn about the best DIY mechanical keyboard kits available on the market and popular “build your own keyboard” websites.
So without any further ado, let’s get started!
Something for everyone🤝: If at any point you feel like the steps and details of building a custom keyboard are getting a little overwhelming, we’ve gathered some top semi-customizable budget mechanical keyboard recommendations you can always check out. Feel free to jump to that section using the TOC below. This guide has something for every mechanical keyboard lover out there!
- How to Build a Custom Mechanical Keyboard – A Quick Checklist!
- What You Need to Figure Out Before You Start Building a Custom Keyboard
- What Parts and Tools Do You Need to Make a Custom-Built Mechanical Keyboard?
- Where Can You Buy the Parts for Building a Custom Keyboard?
- Step 1: Test the PCB
- Step 2: Lube the Switches (Optional)
- Step 3: Install the Stabilizers
- Step 4: Mount the Plate and Lay Out the Switches
- Step 5: Solder the Switches
- Step 6: Stuff the Foam Inside the Case (Optional)
- Step 7: Install the Assembled PCB
- Step 8: Install the Keycaps
- Step 9: Test the Keyboard
- Can You 3D-Print Keycaps for Your Custom Mechanical Keyboard?
- DIY Mechanical Keyboard Kits – For Convenient Customization!
- How Much Does It Cost to Build a Custom Mechanical Keyboard?
- Custom Build Keyboard Websites – An Alternative Solution!
- Why Build a Custom Keyboard
- Best Low-Priced Mechanical Gaming Keyboards
- Is It Better to Build or Buy a Mechanical Keyboard?
How to Build a Custom Mechanical Keyboard – A Quick Checklist!
| Tools🛠️ | Parts⌨️ | Optional Accessories & Tools📦 |
|---|---|---|
| Soldering Iron Desoldering Pump Solder Wire Switch Puller Keycap Puller Tweezers Screwdriver Kit Scissors | Casing Plate PCB Stabilizers Switches Keycaps | Switch Films EVA Foam Switch Opener Switch Lube Soldering Stand MatMini Brush Sharpie |
What You Need to Figure Out Before You Start Building a Custom Keyboard
Before we dive into the customization details, there are a few things you need to figure out. These details will ultimately influence your custom keyboard design in one way or the other.
Preferred OS
Your choice of operating system (OS) plays a role in custom keyboard building. Mac and Windows each have distinct keyboard layouts, requiring specific keycap sets.
Mac users will need Mac-specific keycaps, namely Function, Control, Option, and Command keys. Additionally, the Enter key is called the “Return” key, while the Backspace key is called the “Delete” key. Similarly, Windows users will need Control, Windows, and Alt keys.
Keyboard Size
Next, you need to determine the size as mechanical keyboards come in various form factors, each catering to a specific preference.
- Full-Size Keyboard includes all standard keys, making them well-suited for programming and accounting. However, they do take up a lot of desk space.
- 96% [1800 Compact] Keyboard retains all the keys of a full-sized keyboard. However, the keys are spaced more closely, making the keyboard slightly more compact.
- Tenkeyless (TKL) Keyboard excludes the Numpad and offers a more compact design.
- 75% Keyboard has all the buttons of a TKL keyboard. The only difference is that the buttons are placed more closely with minimum borders.
- 65% Keyboard removes both the Numpad and the Function Row at the top, resulting in a smaller keyboard.
- 60% Keyboard layout removes the Navigation Keys, Arrow Keys, and the Numpad, making a very small – though somewhat compromised – keyboard layout.
- 40% Keyboard only retains the QWERTY keyboard and the Function Keys, making for an extremely compact keyboard, albeit with bare minimum functionality.
Pro Tip💡: If you’re primarily a gamer or have limited deskspace, a smaller keyboard such as 65% or 60% is recommended. However, a full-size custom keyboard may be more suitable if you rely heavily on numerical input for productivity tasks.
Features
You’d obviously want your custom mechanical keyboard to have some cool features you can flaunt. Here are some worth considering:
- RGB Lighting: If you’re into RGB lighting, you can have RGB lights on each switch, an RGB underglow strip going along the borders of the keyboard, or both.
- Programmability: QMK firmware enables advanced customization options, allowing you to remap keys, create macros, and define complex functions tailored to your specific requirements.
- Silent Keys: Not a fan of noisy mechanical keyboards? You can always add silent switches to your custom keyboard.
- USB or Wireless Connectivity: USB ports allow easy plug-and-play functionality, enabling quick and convenient connection to your computer. Meanwhile, certain PCBs offer wireless connectivity, providing greater flexibility and convenience over wired keyboards.
Build Time
Understanding your sourcing options to acquire keyboard parts will help you set your build time expectations, as certain methods may take longer than others. The three most common ways to source keyboard parts are in-stock ordering, group buys, and aftermarket purchases.
In-stock parts are readily available and can be delivered to your doorstep within a week or so. Group buys can take several months as the components are manufactured per demand. By the way, you pay for these upfront. Finally, aftermarket involves buying and trading surplus parts from other keyboard enthusiasts, so the build time may vary greatly with this approach. More on these sourcing options later.
Pro Tip💡: Stay informed about the upcoming group buy programs by joining Reddit and Discord mechanical keyboard communities.
What Parts and Tools Do You Need to Make a Custom-Built Mechanical Keyboard?
Next, let’s look at the essential keyboard parts, mandatory (and optional) tools, and some personal recommendations to help bring your dream DIY custom mechanical keyboard to life.
Parts You Need to Build a Custom Mechanical Keyboard
i) Keyboard Case
The very first thing you need is the keyboard case. Simply called casing by keyboard enthusiasts, it’s the outer shell of the keyboard that holds all the bits and pieces together.
Keyboard cases typically cost $45 on average, with the high-end models costing upwards of $150. They are available in three main materials:
- Plastic Casing is typically made of Polycarbonate or ABS (Acrylonitrile Butadiene Styrene) and tends to be highly affordable and lightweight. However, it lacks durability.
- Acrylic Casing is made of transparent plastic and can offer optical clarity close to glass. It’s highly fragile and easily scratchable, though.
- Aluminum Casing provides excellent durability and premium aesthetics. It’s the best option if you prefer a heavy, durable, and solid keyboard base.
Personal Recommendation👍: Aluminum casings are ideal as they prioritize durability and offer a solid typing experience. However, RGB enthusiasts may want to consider a transparent acrylic casing to show off the RGB lighting effects.
ii) Plate
The plate is the upper lid of the keyboard that holds the PCB and switches into place while improving the overall structural rigidity. Plates vary greatly in price, costing $40 on average. They can be as cheap as $20 to as expensive as $125+. Once again, you have three options to choose from:
- Aluminum Plate is generally preferred by most custom mechanical keyboard hobbyists thanks to its balanced typing experience, flexibility, and overall structural rigidity.
- Carbon Fiber Plate tends to be much lighter than steel and aluminum plates while offering good rigidity. This makes carbon fiber ideal for people looking for a stiff yet lightweight keyboard.
- Steel Plate provides a firm, solid typing feel but can be heavier than aluminum and carbon fiber. Steel plates are ideal for people who prefer some heft to their keyboards.
Personal Recommendation👍: For beginners, aluminum plates are the ideal choice. They offer a more balanced typing experience with a good combination of flexibility and structural rigidity.
iii) Printed Circuit Board (PCB)
It wouldn’t be a far-fetched claim if we say PCB is the backbone of any mechanical keyboard. What does PCB stand for in the keyboard world, and what does it exactly do?
PCB or connects and coordinates keyboard switches to your PC by converting mechanical energy into electrical signals. PCBs cost around $40 on average. However, they can be as expensive as $100. There are three common types of PCBs:
- Standard PCB requires soldering the switches to the PCB. This PCB type excels in flexibility, key placement, and customization.
- Hot-swappable PCB doesn’t require soldering and allows for easy switch swapping. However, it lacks the customization potential of a standard PCB. You may be unable to use an ISO layout or install spacebars other than 6.25u.
- Through-hole PCB involves advanced soldering skills and requires soldering various components, including diodes, resistors, USB ports, etc. It offers extensive, almost unlimited, customization potential.
Personal Recommendation👍: PCBs with 3- or 5-pin hot-swap sockets are an absolute no-brainer for beginners. While they lack the customizability of soldered and through-hole PCBs, they provide a quick, convenient way of experimenting with your first custom-built mechanical keyboard.
iv) Stabilizers
Stabilizers are used in large keys such as Shift, Spacebar, and Enter/Return keys to prevent wobbling and ensure a consistent typing experience. They can cost anywhere between $5 and $30.
The most common types of stabilizers include:
- Plate-mounted Stabilizers are affixed to the metal plate above the PCB and have a slightly mushy feel to them.
- Screw-in Stabilizers screw into the PCB, providing a secure, stable typing experience.
- Clip-in Stabilizers, also called PCB-mount stabilizers, snap directly into the PCB and are quite easy to install. However, they may introduce a slight wobble.
Personal Recommendation👍: Screw-in stabilizers are recommended over plated-mounted and clip-in stabilizers. While they’re slightly more difficult to install, the solid, stable feel they provide makes the extra effort worthwhile.
v) Switches
Switches determine the tactile and auditory feedback of the keystrokes. Hence, many people consider them the heart of a mechanical keyboard. Switches come in bulk, so prices vary greatly depending on the number of units you order. On average, a single switch costs around $0.45.
There are three main types of switches:
- Clicky Switches, usually called ‘Blue Switches,’ are far the most common switch type. As the name suggests, clicky switches make a distinctive ‘click’ sound when pressed with a slight but noticeable tactile bump in key travel.
- Linear Switches, also called ‘Red Switches,’ offer a smooth keystroke with no bumps in the key travel, making them the ideal choice for gaming. However, some users may find them a bit on the quieter side.
- Tactile Switches, or ‘Brown Switches,’ sound just like linear switches. The key difference is the slight bump in their travel, making them ideal for people who like the tactile feedback of clicky switches but don’t want to deal with their sound.
Pro Tip💡: When exploring switch types, consider ordering switch sample packs to determine which type of switch suits your typing or gaming style the best. Cherry MX, Gateron, NovelKeys, ZealPC, and Outemu are some popular switch manufacturers.
vi) Keycaps
Keycaps are small plastic caps that are placed on the switches. Just like switches, keycaps are ordered in bulk, so prices may vary depending on how many switches you order. Budget keycap sets can cost as low as $15, while more premium sets can cost over $75.
There are two main types of keycaps:
- ABS Keycaps are made of Acrylonitrile Butadiene Styrene and come in a wide range of designs and color options. However, they tend to wear out rapidly.
- PBT Keycaps are made of Polyethylene Terephthalate. They offer superior durability than ABS keys with a unique textured surface, albeit with fewer design options.
Both ABS and PBT keycaps can be either uniform or sculpted. Uniform keycaps have the same height, giving the keyboard a level surface. Sculpted keycaps, on the other hand, have different heights for each row, providing better typing comfort and ergonomics.
Personal Recommendation👍: Choose custom keycaps made of PBT, if possible. They are more durable than ABS keycaps and resist wear and tear far better. Sculpted keycaps, such as MDA or Cherry-Profile, are ideal for typists while gamers may prefer uniform keycaps such as DSA.
Tools You Need to Build a Custom Mechanical Keyboard
i) Soldering Iron
A soldering iron is a must-have tool if you have a standard PCB that requires you to solder the switches. However, it’s optional in case you have a hot-swappable PCB.
ii) Desoldering Pump
Desoldering pump, also known as a solder sucker, is used to remove excess solder or desolder old switches. It’s an especially invaluable tool for beginners who are most likely to make mistakes while soldering. Even experienced keyboard builders may find it helpful as it speeds up the desoldering process.
iii) Solder Wire
Solder is a flexible, metallic thread made of tin and lead, and an essential component of soldering. It’s melted using a soldering iron to solder the switches onto the PCB, ensuring electrical conductivity.
iv) Switch Puller
A switch puller is another necessary tool for building a custom mechanical keyboard to remove or ‘pull’ switches from the PCB safely. It simplifies the switch replacement process and makes it easier to pull out a switch without damaging it.
v) Tweezers
Tweezers are always handy for picking-up small components such as springs or tiny screws or testing the keyboard’s PCB for potential faults.
vi) Keycap Puller
Like the switch puller, a keycap puller is designed to safely remove keycaps from the keyboard without causing scratches or cracks. It allows for easy customization, cleaning, or replacement of the keycaps.
vii) Screwdriver Kit
A screwdriver kit consists of numerous screw bits in different sizes, making it an essential tool for keyboard assembly and disassembly. The kit ensures you have all the appropriate screwdriver bits for different types of screws.
viii) Scissors
Scissors are always helpful while assembling a keyboard. They come in handy for cutting materials like fabric for switch modifications, opening packages containing keyboard components, or performing numerous other tasks during the keyboard-building process.
Optional Accessories & Tools for a Custom Mechanical Keyboard
i) Switch Films
Switch films are thin, transparent rubber layers between the switch housing and PCB. While considered optional, they help reduce switch wobble, stabilize keystrokes, and enhance the overall typing experience by providing a consistent feel and sound.
ii) EVA Foam
In recent years, EVA foams have become quite popular among custom-built mechanical keyboard enthusiasts. They help with sound dampening and enhance your keyboard typing experience.
iii) Switch Opener
A switch opener is a specialized tool that makes it easier to open switches for modifications, such as lubing or filming. It simplifies the process, saving time and effort while preventing switch damage.
iv) Switch Lube
Switch lube is used to make a mechanical keyboard quieter and smoother overall. It is applied to the switch components, reducing friction and enhancing smoothness.
v) Soldering Stand and Mat
A soldering stand provides a safe and stable place to hold the soldering iron when not in use, minimizing the risk of accidents. Similarly, a soldering mat offers a heat-resistant surface to protect your workspace from heat damage and provides a convenient area to organize and keep small components together.
vi) Mini Brush
A mini brush to help with the application of lubricant when lubing switches for your mechanical keyboard. You can use a precision or nylon brush, whatever is easily accessible.
vii) Sharpie
A sharpie for marking when installing foam inside your mechanical keyboard.
Personal Recommendation👍: Switch lube products like Molykote em-30L and Krytox 205g0 are recommended for their superior quality.
Where Can You Buy the Parts for Building a Custom Keyboard?
There are different ways to source the parts to build your dream custom mechanical keyboard, including in-stock purchases, group buys, and aftermarket. Let’s quickly review them:
- In-Stock Parts: In-stock parts are readily available items from online vendors. While they offer limited inventory selection, these parts can be quickly delivered, usually within a week, ensuring a relatively short build time.
- Group Buys: Group buys involve a collective purchase of keyboard components. However, this approach often requires a longer wait time, sometimes several months, as the components are produced based on demand.
- Aftermarket: The aftermarket scene refers to acquiring keyboard components from other keyboard enthusiasts who may be selling or trading unused or surplus items. The delivery time of aftermarket parts may vary depending on the nature of the items.
The table below summarizes the pros and cons of each sourcing option:
| Sourcing Option | Pros | Cons |
|---|---|---|
| In-stock Parts | Easy ordering, Quick Delivery | Limited inventory selection |
| Group Buys | Cost savings, Wider customization options | Delivery can take long, often months |
| Aftermarket | Cheap, Access to rare and discontinued items | Easy to get scammed |
Here are some platforms and websites for in-stock purchases and group buys:
Websites for In-Stock Purchases:
- Kebo Store
- Keno Store
- Drop
- Keebio
- KBDfans
Website for Group Buys
- Mechgroupbuys.com
- Keycaplendar
- Novelkeys
- KBDfans
For aftermarket purchases, you can check out the Reddit r/MechMarket community. It has a massive 285K user base. Not on Reddit? You can join the MechKeys Discord server. It has around 45K members.
With the design layout and features finalized and the necessary parts and tools identified, let’s move to the more actionable phase of our discussion and walk you through the steps of building a custom mechanical keyboard.
Step 1: Test the PCB
🛠️ Tools required: tweezers, online PCB testing tool
Before you start assembling your custom mechanical keyboard, you must check if your PCB (Printed Circuit Board) is functioning properly. This step will help you diagnose and troubleshoot a faulty PCB in a timely manner. Trust us; you don’t want to find your PCB is broken once you are done assembling your keyboard.
Connect your PCB to your computer and test each switch on the PCB using tweezers. Gently touch the two metal contact points of each switch to simulate a keypress. See if the corresponding key registers.
There are numerous free PCB tester software available online such as VIA or Key-Test. These online tools allow you to test each PCB connection and ensure they are all working correctly.
Step 2: Lube the Switches (Optional)
🛠️ Tools required: switch lube, switch puller, switch opener, tweezers, mini brush
Lubricating your switches enhances the typing experience of your custom mechanical keyboard. While this step is entirely optional, it is highly recommended if you want smoother keystrokes with a more satisfying sound.
To lube your switches, carefully disassemble each switch and apply a small amount of high-quality switch lubricant to the switch’s spring, stem, and lower and upper housings.
Pro Tip💡: Don’t lube clicky switches as it may muffle or even downright mute their clicky sound, leading to poor performance.
Step 3: Install the Stabilizers
🛠️ Tools required: tweezers
Stabilizers are essential for larger keys like the Spacebar, Enter, and Shift keys, as they prevent wobbling and provide a smoother typing experience.
To install a stabilizer, insert the plastic stabilizer clips into the keyboard plate, ensuring the hook side is pressed-in first. Then insert the stabilizer spring into the back of both clips with adequate force.
Pro Tip💡: Band-aid modding your stabilizers can dramatically improve their sound and feel. Start by applying lubricant to the stabilizers. Clip off the small feet from their bottoms and place a small band-aid strip on the PCB where they make contact.
Step 4: Mount the Plate and Lay Out the Switches
🛠️ Tools required: tweezers
Place the keyboard plate on top of your PCB, followed by the switch films (if you’re using any), and carefully arrange the switches in your desired layout. Next, get your soldering setup ready.
Step 5: Solder the Switches
🛠️ Tools required: soldering iron, desoldering pump, solder wire, switch puller, tweezers
If you’re using a PCB that doesn’t have hot-swappable sockets, soldering is necessary to secure the switches. Aim for a small, even solder bead when soldering the two metal pins of each switch to the PCB. Always choose high-quality solder wire and practice soldering techniques on scrap metal before applying it to a custom keyboard.
To install switches on a hot-swappable PCB, simply press each switch into the plate, allowing the pins to enter the board. You don’t need to solder the switches for a hot swap PCB.
In case you find that you’ve installed a switch incorrectly, use a switch puller to pull out the switch safely and reinstall it in the correct location.
Pro Tip💡: Be careful while installing the switches, as it’s surprisingly easy to bend their fragile pins accidentally. If you do end up bending some pins, simply use tweezers to re-straighten them.
Step 6: Stuff the Foam Inside the Case (Optional)
🛠️ Tools required: sharpie, scissors
If you bought an EVA foam to improve the acoustics of your custom mechanical keyboard, it’s time to install it. Stuff the foam inside the keyboard case. Mark the extra foam with a sharpie and cut it with scissors.
Step 7: Install the Assembled PCB
🛠️ Tools required: screwdriver kit
Check the rubber feet are in the right place on the keyboard casing, and start mounting your assembled PCB. Carefully handle the PCB so the switches and stabilizers don’t fall off. Read the instructions manual on how to mount your assembled PCB onto the casing. The mounting style would vary depending on the type of casing used. In most cases, screwing the PCB works.
Pro Tip💡: Make sure the PCB is properly centered inside the case to avoid any imbalance or instability. Also, don’t use force while inserting the PCB, as it might damage the casing, PCB, or both.
Step 8: Install the Keycaps
🛠️ Tools required: keycap puller, tweezers
Now it’s time to apply the finishing touches to your brand new keyboard and install the keycaps. Start by installing the larger keys with stabilizers such as Spacebar, Enter Key, Shift, Key, etc. Insert the stabilizer support stems into the non-switch holes and align the key with the stabilizer.
To attach the keycap, slide one support stem onto the stabilizer and gently flex the stabilizer open with tweezers or a small screwdriver to make it easier to slip the stem. Align the stabilizer stem with the corresponding holes in the keycap before firmly pressing down.
For the smaller keys, check the keycaps are in the correct orientation and firmly press them on their corresponding switches. Repeat the process until you’ve placed all the keycaps on the keyboard. Use a keycap puller if you accidentally put a keycap on the wrong switch.
Step 9: Test the Keyboard
🛠️ Tools required: online typing test tool
With all the components assembled, put your custom-made keyboard to the test. Boot up a typing test program, such as Monkey Type, and start typing to get a feel for your new keyboard. Ensure all the buttons are working correctly and the larger keycaps are seated firmly with no wobbles.
And that’s it! You’ve successfully built a custom mechanical keyboard. Enjoy the unique typing experience and satisfaction of using a keyboard you put together yourself.
Can You 3D-Print Keycaps for Your Custom Mechanical Keyboard?
Yes, you can 3D print keycaps for custom mechanical keyboards. Transparent PETG filament is commonly used to achieve translucent keycaps. However, resin, most notably ABS, is a good alternative to PETG, providing a smoother, shinier texture.
It must be mentioned that 3D-printed keycaps typically lack the quality and durability of commercially available keycaps, especially PBT keycaps. Additionally, 3D printing may result in rough-looking keycaps and can be highly time-consuming.
DIY Mechanical Keyboard Kits – For Convenient Customization!
If you’re feeling overwhelmed by the number of choices and concerned about ordering each part individually, you can also consider buying a DIY mechanical keyboard kit. These kits include all the major components, such as casing, stabilizers, PCB, and in some cases RGB lights, making parts selection and ordering much easier and convenient.
Please note DIY mechanical keyboard kits usually don’t come with switches and keycaps, and you will most likely have to order them separately. Here are our favorite DIY mechanical keyboard kits:
- Redragon BBK530 Pro: Available in Compact (60%), TKL, and full-sized layouts, the BBK530 kit includes a hot-swappable PCB with RGB and supports Bluetooth 5.0, 2.4G Wireless, and USB-C for connectivity.
- EasySMX Custom Gaming Keyboard: EasySMX is available in 75% keyboard layout with a hot-swappable PCB that supports both 3- and 5-pin switches. The DIY kit features RGB with support for ‘Triple Mode’ connectivity, i.e., Bluetooth, 2.4G, and USB-C.
- EPOMAKER Mini Cat 64: The Mini Cat 64 is a cute 60% keyboard with RGB lighting, a hot-swappable PCB, stacked acrylic case, and USB-C for wired connectivity.
How Much Does It Cost to Build a Custom Mechanical Keyboard?
Custom mechanical keyboards typically cost between $185 and $200 on the lower end. However, the final cost may vary significantly depending on the brand, quality and material of the parts used, the size of your keyboard, and the features you want to install.
Additionally, components prices in the aftermarket scene may vary greatly. It’s not all that unusual to find keyboard parts at great deals on Reddit’s r/MechMarket subreddit or Discord’s MechKeys server, far cheaper than the prices of in-stock parts and group buys.
Why is Building a Mechanical Keyboard so Expensive?
Mechanical keyboards tend to be more expensive because of their higher parts quality, exclusivity, and customizability. Additionally, they are produced in smaller quantities, and so they always have a pricing disadvantage compared to pre-built keyboards that are mass-produced in large factories. The economy of scale simply doesn’t apply to them.
Custom Build Keyboard Websites – An Alternative Solution!
Even when using a DIY custom keyboard kit, some people still find building a mechanical keyboard overwhelming. This can be especially true for beginners who may not always be sure about the parts they are ordering and if they are compatible.
If you’re also thinking the same, you can use keyboard building websites to design and build your dream mechanical keyboard.
These websites do all the legwork for you by allowing you to build a virtual keyboard on their platform. You can test different parts for compatibility, see how they look together, and order the components or purchase an assembled keyboard for a small fee.
Here are some of the best custom keyboard websites:
- Cherryxtrfy offers you the freedom to personalize your keyboard by selecting the layout, base, switches, keycaps, and frame. You can order these parts individually or opt for a pre-assembled keyboard for as low as $25.
- Keyboardpartpicker allows you to customize your keyboard by selecting the frame, keycaps, switches, and base. The site also automatically checks whether or not the chosen components are compatible with each other, saving you from any potential missteps.
- Varmilo allows you to design your custom keyboard in any size you prefer, enabling you to tweak every imaginable aspect to create the keyboard of your dreams without worrying about compatibility or parts availability.
Why Build a Custom Keyboard
You might ask yourself, is building a custom keyboard even worth it? Why go to all this length, all this trouble? Well, here are a few reasons why you should build your very own custom keyboard:
- The number one reason is personalization. A custom keyboard reflects your personality by allowing you to express your unique individuality. So, if you like owning a one-of-a-kind piece of hardware, a custom keyboard is the obvious choice.
- A custom keyboard also allows you to fine-tune its ergonomics. You have the complete freedom to choose any layout, be it 40%, 60%, 65%, 75%, 80%, or 100%. You can also make split and angled keyboards if you so choose.
- Last but not least, mechanical keyboards are future-proof. Like most things, custom keyboards are all about trial and error. So, if you end up disliking a certain aspect of your keyboard, you can always tweak it to perfectly fine-tune it to your liking.
But as exciting as the prospect of building your own mechanical keyboard sounds, not everyone can afford to build one. It also takes a certain level of technical skill and expertise to design a custom keyboard, as you would have realized by now.
In that case, buying a pre-built mechanical keyboard is totally cool. We’ve picked some of the best, semi-customizable, budget mechanical keyboards you can buy right now:
Best Low-Priced Mechanical Gaming Keyboards
- HyperX Alloy Origins Core: Available in three custom sizes, including full-size, tenkeyless, and 60%. You also get multiple switch options to choose from, namely HyperX Aqua (tactile), Red (linear), and Blue (clicky) switches. Both the keycaps and switches are compatible with standard MX switches.
- Royal Kludge RK61: A 60% keyboard available with MX compatible Blue, Red, and Brown switches. It can be ordered in black or white color. The PCB is hot-swappable, making it a breeze to replace switches. Unfortunately, the keycaps are made of ABS material, though they’re universal and easily swappable.
- Redragon Kumara K552: A tenkeyless keyboard available with Outemu Red, Blue, and Brown switches. You can choose between red-color and black-color profiles depending on your preference. Adjustable rainbow RGB lighting.
You can learn more about these keyboards in our best budget mechanical keyboard guide.
Is It Better to Build or Buy a Mechanical Keyboard?
Owning a custom mechanical keyboard is cool because it showcases your unique personality and style through tailored keycap designs and colors, making your setup stand out. Furthermore, the premium performance, enhanced by your choice of mechanical switches, elevates your typing and gaming experience. However, building a custom mechanical keyboard requires a lot of time and effort, and the overall process can be overwhelming for some. Also, you must have a good budget.
This is where buying pre-built mechanical keyboards can be an excellent alternative. If you can find a mechanical keyboard that offers customization options, even better. Our budget recommendations above allow you several, albeit limited customization options to play with.
There is a misconception that custom-built mechanical keyboards last longer than their counterparts. While that’s true to some extent, if you are buying a keyboard from a reputable supplier and brand, you should be good. The overall durability of mechanical keyboards ensures a long-lasting investment. Still, it’s completely fine if you want to build a mechanical keyboard. Know that Team RealGear will be cheering you on all the way!